Steam is the largest digital video game distribution service in the world where users can buy and download their favorite games. It is owned and operated by Valve and was originally just a simple way to automatically update their games but Steam has grown to even include games from third-party publishers. Steam is available for free and is nearly present in all desktop and mobile device platforms.
Your usage of Steam can be further optimized with the utilization of a Steam proxy. There are many use case of a Steam proxy that will undoubtedly aid you when playing games on it. The best example would be that it provides you with a faster and stronger internet connection letting you download games faster and play games with low latency to prevent in-game lag.
A Steam proxy would also be useful if you want to play a game that’s not available in your region as some games are restricted only to a certain region. A Steam proxy will allow you to change your location to a place that can access that game. If the network you’re using has blocked Steam from being accessed, a Steam proxy can help you unblock Steam from that network.
The best Steam proxies to use would be either datacenter proxies or residential proxies, depending on what you want. If you want a faster internet connection and low latency when playing, then datacenter proxies are what’s best for you. If you want to sacrifice a bit of speed to protect your privacy and effectively bypass any restriction, whether it be a geo-restriction or a network restriction, then residential proxies are the way to go.
Let’s set up a Steam proxy server.
For Windows:
To set up proxies in Windows, simply search for “Proxy Settings” in your windows search bar and open the search result.
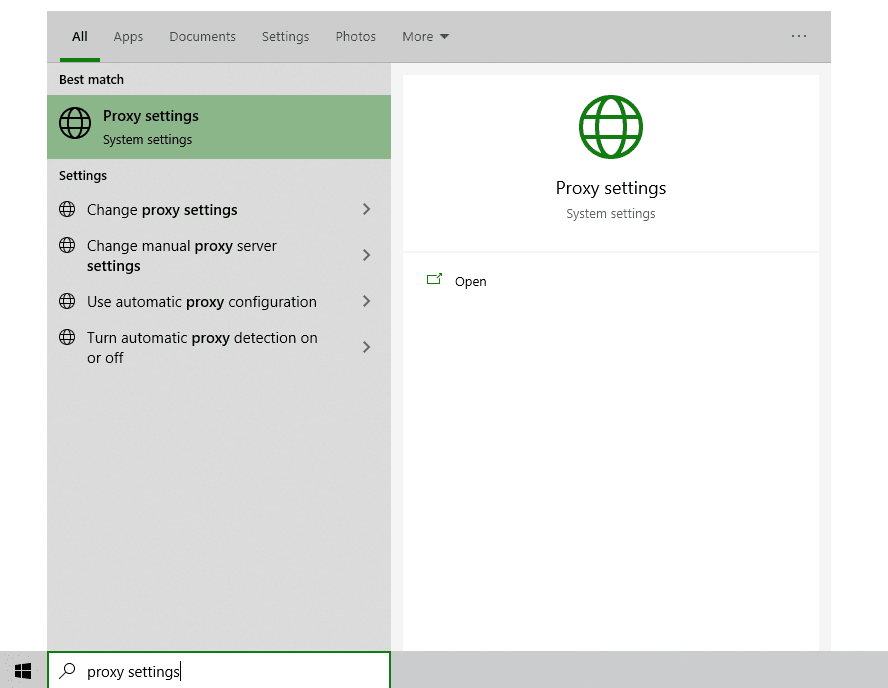
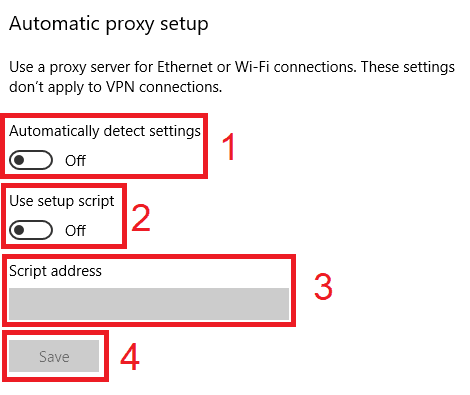
You are then given two options to choose from: Automatic proxy setup or Manual proxy setup. If you want windows to automatically detect your proxy settings, choose the first option. Choose the second option if you want to utilize a specific ip address and port number.
If you chose the first option, then:
- Turn on Automatically detect Settings
- Turn on Use setup script
- Enter the script address
- Click Save
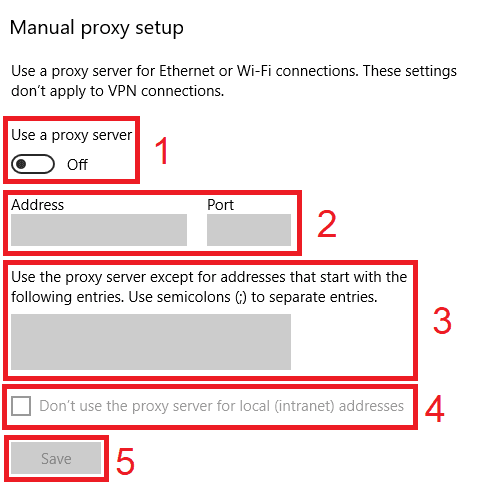
If you chose the second option, then:
- Turn on Use a proxy server
- Input both server address and port number
- If you have any addresses you would like to visit without a proxy, enter them here
- Turn on Don’t use the proxy server for local addresses check box if you want to access a local server without a proxy
- Click Save
For Mac.
To start configuring your proxy settings in MacOS, simply:
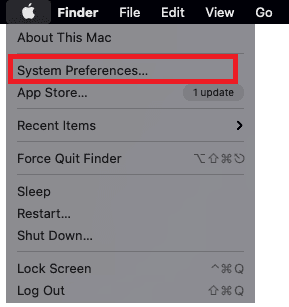
Step 1. Click on the Apple Icon.

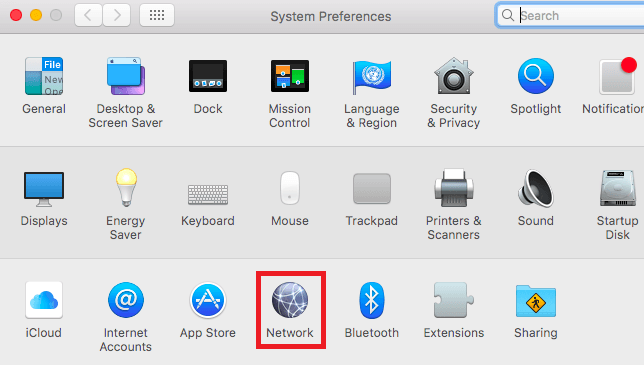
Step 2. On the drop down menu, click on “System Preferences”.
Step 3. Click on “Network”
Step 4. Click on “Advanced”
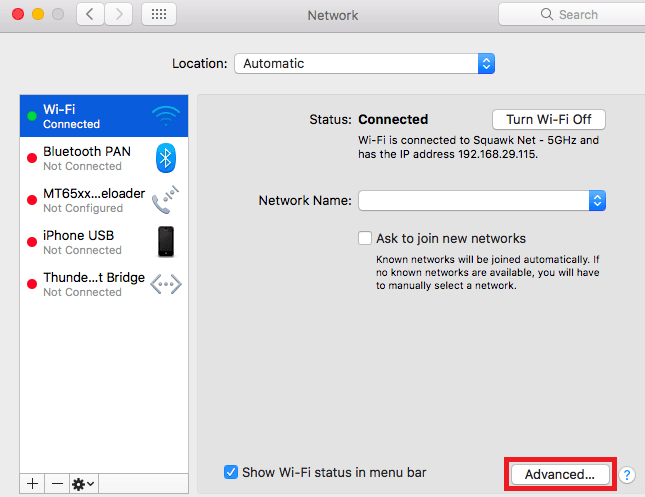
Note: Make sure to connect to your wi-fi first.
Step 5. Click on “Proxies”

This should then redirect you to MacOS proxy settings. MacOS is more straightforward compared to windows. You only have one option which is to manually configure your proxy server.
Here are the steps to follow:
- Select which proxy IP protocol you want to configure. This depends on which protocols your proxy service provider offers.
- Turn on Secure Web Proxy
- Input the Proxy Server Address and Port Number
- Click OK to save the configurations
Note: You may be prompted for your Mac user password to save your settings.
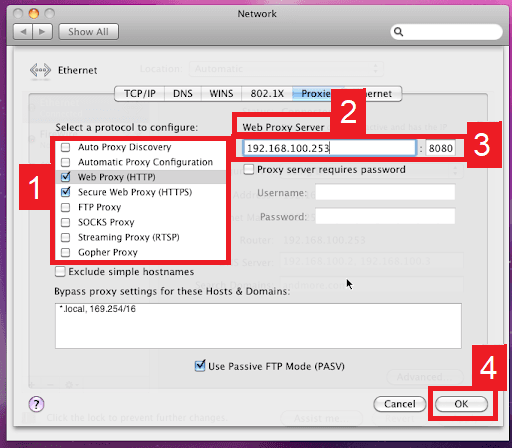 Image Alt Text: Configuring MacOS Proxy Settings
For Mobile:
To set up a Steam proxy server for your mobile device, simply change your phone’s proxy settings. The Steam mobile app will automatically copy your phone’s proxy settings whenever you use it. This is applicable for both Android and iOS. Here’s a thorough guide for Android and another one for iPhone.
Congratulations! You have now finished configuring your Steam proxy server.


 Image Alt Text: Configuring MacOS Proxy Settings
